Install the Surface SDK on Windows 7 and/or x64
Update: Running Surface SDK SP1? See my other post on how to install it on a 64-bit machine...
The Microsoft Surface SDK was given out to some folks at PDC 2008. I know the SDK is not out to the masses yet, however one of the questions/requests posted most frequently in the Surface forums is the ability to install the SDK on a 64-bit machine, and/or on Windows 7. I’ve put together a quick guide that will show how to accomplish this. But be warned…by doing this you are throwing away support from Microsoft. This is an entirely unsupported setup and the Microsoft Surface folks won’t be able to help you. So, if official support is important to you, this guide isn’t for you. With that said, let’s continue…
Please note that you will still need to have Visual Studio 2008 Express or greater installed, and you will need to have the XNA 2.0 Framework runtime installed.
To perform the actions in this guide you will need to install Orca, a tool for editing MSI files, included with the Windows SDK. Unfortunately, this utility isn’t available separately and will require you to download the full SDK to get it. You can download the Windows Vista or Windows 7 SDK here.
1) Remove the platform checks from the MSI
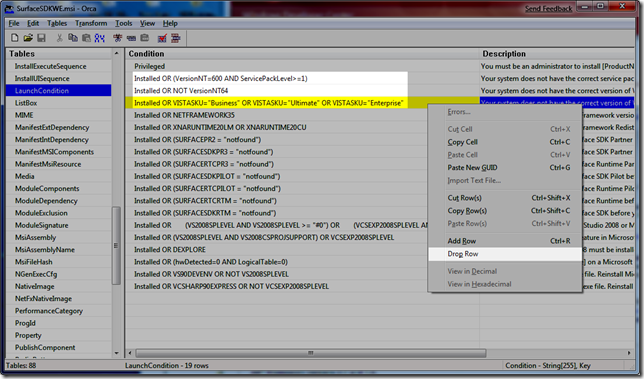
Open the SurfaceSDKWE.msi file in Orca. Select LaunchCondition from the left pane. In the right pane, individually select the rows highlighted in the screenshot below, right-click, and select Drop Row. This will remove the checks for 64-bit, Windows Vista, and Windows Vista SP1. The rows are:
- Installed OR (VersionNT=600 AND ServicePackLevel>=1)
- Installed OR NOT VersionNT64
- Installed OR VISTASKU="Business" OR VISTASKU="Ultimate" OR VISTASKU="Enterprise"
After the rows are dropped, save the MSI using the standard File –> Save menu option.
2) Install the SDK
Now that the MSI has been edited to remove the checks, install the SDK normally.
If you are using Windows 7 x86, you are done! If you are running on an 64-bit OS, please continue…
Now that the SDK is installed, several executables need to be patched to be forced to run inside the 32-bit CLR instead of the 64-bit CLR. This will be done using the corflags.exe utility. If you have the full Visual Studio installed, simply open an elevated Visual Studio Command Prompt from the Start Menu and the path to corflags.exe will automatically be loaded. Otherwise, you should find this in the C:\Program Files\Microsoft SDKs\Windows\v6.1\Bin directory and you can set your PATH environment variable appropriately.
With the path to corflags.exe in your PATH environment variable, change to the following directory:
C:\Program Files (x86)\Microsoft SDKs\Surface\v1.0\Tools\Simulator
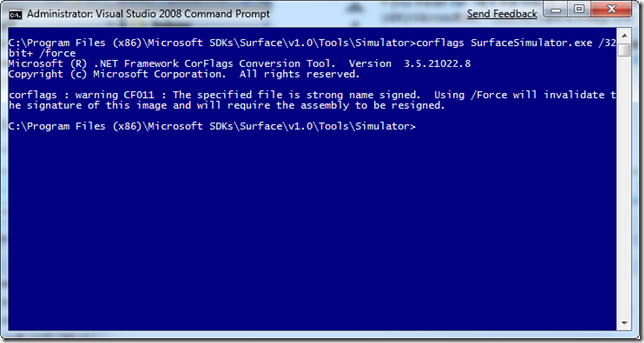
Inside this directory, run the following command:
corflags SurfaceSimulator.exe /32bit+ /force
You will get a warning that the file is strong named signed. You can safely ignore this.
Next, change to the following directory:
C:\Program Files (x86)\Microsoft Surface\v1.0
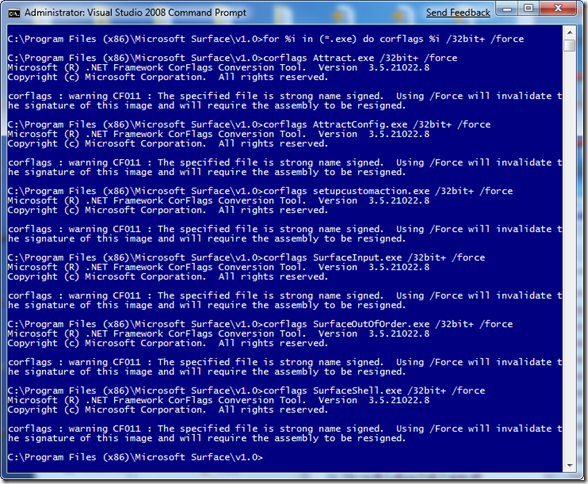
There are several executable to be patched in this directory. You can easily do this from a single command as follows:
for %i in (*.exe) do corflags %i /32bit+ /force
This will enumerate all .exe files and patch them as done above. You will again see the warning, and again, it can be safely ignored.
Update 12/4/09: If you have problem with the Identity Tag printer not bringing up the printer dialog box, modify the above command to add the /UpgradeCLRHeader switch. Thanks to Klaus Amtoft for this tip!
If you don’t care about running the sample applications, you are finished. If you want to install and run the samples in the simulator, continue.
4) Build and fix the samples
The samples, by default, are setup to build as “Any CPU” executables. This means they will always run under the 64-bit CLR, which is a problem. They need to be built to run in the 32-bit CLR. There are two ways to handle this: 1) you can edit each .csproj file to create an x86 build type and build the project, or 2) you can build the projects as-is, and patch them later. I find option 2 to be easiest, so that’s what will be described here. Note that you won’t be able to run and debug these samples via Visual Studio by doing this…if this is required, please go with option 1.
Unzip the Surface Code Samples.zip file from the C:\Program Files (x86)\Microsoft SDKs\Surface\v1.0\Samples directory. This should output a SDKSamples directory. In this directory, open the InstallSamples.bat file in Notepad. You will see several lines that check the registry for various things. Each one of these will path the registry in a way similar to the following:
HKEY_LOCAL_MACHINE\SOFTWARE\Microsoft\Surface\v1.0 /v IsLogicalSurfaceUnit
Modify each of these to add the Wow6432Node key, which is part of the 64-bit registry that 32-bit applications access:
HKEY_LOCAL_MACHINE\SOFTWARE\Wow6432Node\Microsoft\Surface\v1.0 /v IsLogicalSurfaceUnit
It’s probably easiest to do a find and replace, finding SOFTWARE\Microsoft and replacing with SOFTWARE\Wow6432Node\Microsoft.
Next, run the InstallSamples.bat file. This will build each sample and deploy them to the Microsoft Surface Simulator.
Now we need to patch the built executables. Back in the elevated Visual Studio Command Prompt, change to the directory where you unzipped the sample SDKs. For me, this path is:
C:\Program Files (x86)\Microsoft SDKs\Surface\v1.0\Samples\SDKSamples
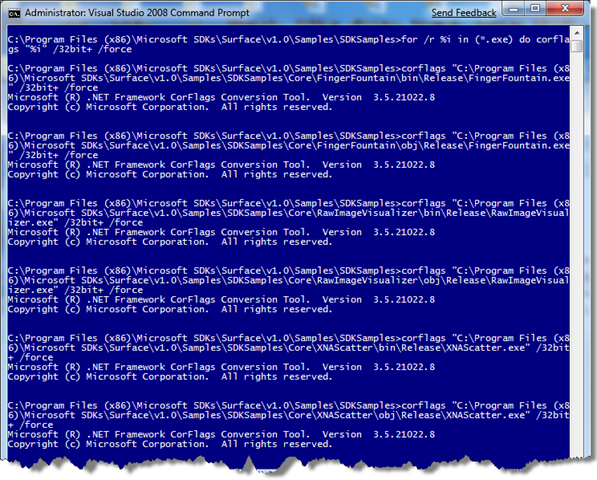
Run the following command to enumerate all directories and patch the executables:
for /r %i in (*.exe) do corflags “%i” /32bit+ /force
Each file will be patched to run in the 32-bit CLR only.
That’s it! You should now be able to build, run and debug applications using Visual Studio and the Microsoft Surface SDK on Windows 7 and Windows Vista, either x86 or x64.
Just remember…this is a totally unsupported scenario, so run at your own risk!


