x64 Development with .NET
Earlier this year I made the switch to a 64-bit operating system - Vista Ultimate x64 to be exact. For the most part, this process has been relatively painless, but there have been a few hiccups along the way (x64 compatible drivers, mainly, but that's not the point of this discussion).
In the world of x64 development, there have been a few struggling points that I thought I'd outline here. This list will likely grow, so expect future posts on the matter.
In the wonderful world of .NET development, applications and assemblies can be compiled to target various platforms. By default, applications and assemblies are compiled as Any CPU in Visual Studio. In this scenario, the CLR will load the assembly as whatever the default target is for the machine it is being executed on. For example, when running an executable on an x64 machine, it will be run as a 64-bit process.
Visual Studio also provides for 3 specific platform targets: x86, x64 and Itanium (IA-64). When building an executable as a specific target, it will be loaded as a process of that type. For example, an x86-targeted executable run on an x64 machine will run as a 32-bit process using the 32-bit CLR and WOW64 layer. When assemblies are loaded at runtime, they can only be loaded by a process if their target matches that of the hosting process, or it is compiled as Any CPU. For example, if x64 were set as the target for an assembly, it can only be loaded by an x64 process.
This has come into play in a few scenarios for me:
- XNA - XNA is available as a set of 32-bit assemblies only. Therefore, when referencing the XNA assemblies, the executable/assembly using them must be targeted to the x86 platform. If it is targeted as x64 (or as Any CPU and run on a 64-bit machine), an error will be thrown when trying to load the XNA assemblies.
- Microsoft Robotics Studio - The XInputGamepadService uses XNA internally to talk to the Xbox 360 controller. See above.
- Managed DirectX - While this is already deprecated and being replaced with XNA, it still has its uses. The assemblies are not marked for a specific target, however I had difficulty with memory exceptions, especially with the Microsoft.DirectX.AudioVideoPlayback assembly.
- Phidgets - Depending on what library you download and when, it may or may not be marked as 32-bit only. The current version (11/8/07) is marked as such, and so requires a 32-bit process to host it.
The easiest way to determine if an executable or assembly is targeted to a specific platform is to use the corflags application. To use this, open a Visual Studio Command Prompt from your Start menu and run it against the assembly you wish to check.
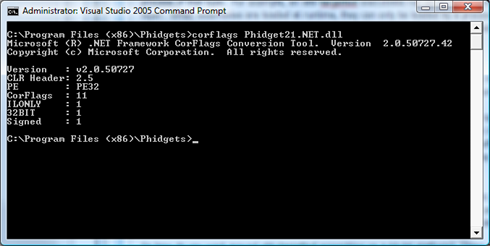
Here's a handy table to decode the resulting information:
| CLR Header | NOT the version of the CLR the file is compiled for 2.0 = .NET 1.0 or 1.1 2.5 = .NET 2.0 |
| PE | PE header type PE32 = 32-bit PE32+ = 64-bit |
| CorFlags | Various flags for endian type, ILONLY, etc. |
| ILONLY | The file contains IL only (i.e. no unsafe code) |
| 32BIT | 1 = x86 target 0 = Any CPU target |
| Signed | 1 = Assembly signed 0 = Assembly not signed |
And here is a second table showing the mapping from target to flags:
| Any CPU | PE32 with 32BIT = 0 |
| x86 | PE32 with 32BIT = 1 |
| x64/Itanium (IA-64) | PE32+ with 32BIT = 0 |
So how do you work around using 32-bit assemblies on a 64-bit platform? There are two answers to this.
Use corflags against the file with the /32BIT- switch to remove the x86 restriction. This will make the assembly look like an "Any CPU" compilation. Note that this will only work on unsigned assemblies. If the assembly is signed, you can use the /Force switch to make the change, but this will likely just break the assembly and make it unusable. I don't personally recommend using corflags since it's likely that if an assembly is distributed with this flag set, it's probably done that way for a reason. So, let's look at method two.
Create a new configuration which targets x86 and everything should work. With the host process being forced to run as a 32-bit application, any 32-bit specific libraries will work just fine. Here's how:
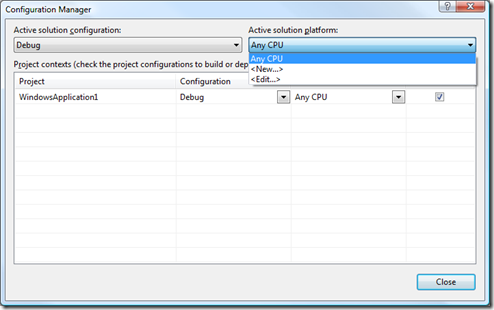
- From the Build menu, select Configuration Manager
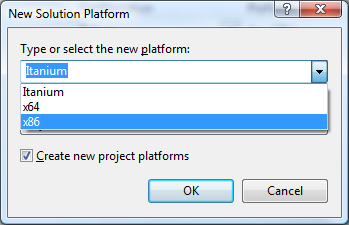
- In the Active solution platform: drop down, select <New...>
- In the Type or select new platform drop down, select x86
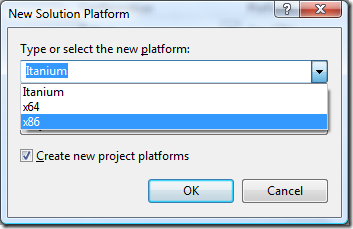
- Click OK to get back to the main Visual Studio window and ensure the x86 configuration is selected in the build bar or in the Platform drop down in the project settings.

- Rebuild the project
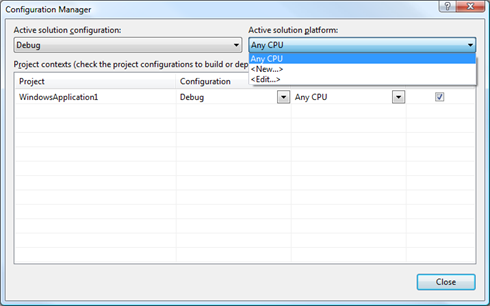
Your output will now be located in the bin\x86 directory.
In the next installment, I'll discuss some of the issues with using P/Invoke in .NET from the 64-bit world.