Migrating BlogEngine.NET Comments to Disqus and Ghost
By default, Ghost does not have a commenting system of its own. When migrating my blog from BlogEngine.NET, I wanted to carry over old comments and maintain the commenting feature. Disqus to the rescue!
Migrating Old Comments
First, you’ll need to create an account at Disqus and select the “I want to install Disqus on my site” option. From here, you’ll walk through a wizard where you’ll give the website name, URL and other bits of information. Sign up with the Basic (free!) option.
Next, you’ll need to use that BlogML.xml file you created in the previous post and run it through a utility to convert it into a format that can be imported into Disqus.
Head over to GitHub to download and compile the BlogML2WP project, or download my precompiled version. Then, run the program like this:
BlogML2WP [inputfile] [domain]
So, for my site, it’d look like this:
BlogML2WP BlogML.xml https://brianpeek.com/
This will create a new file named BlogML.Output.xml. Open this file in your favorite text editor, as you will need to “find and replace” some URL information since all posts and pages now live at the root of the site instead of the /post and /page URLs that BlogEngine uses.
- Find /post/ and replace with /
- Find /page/ and replace with /
Import to Disqus
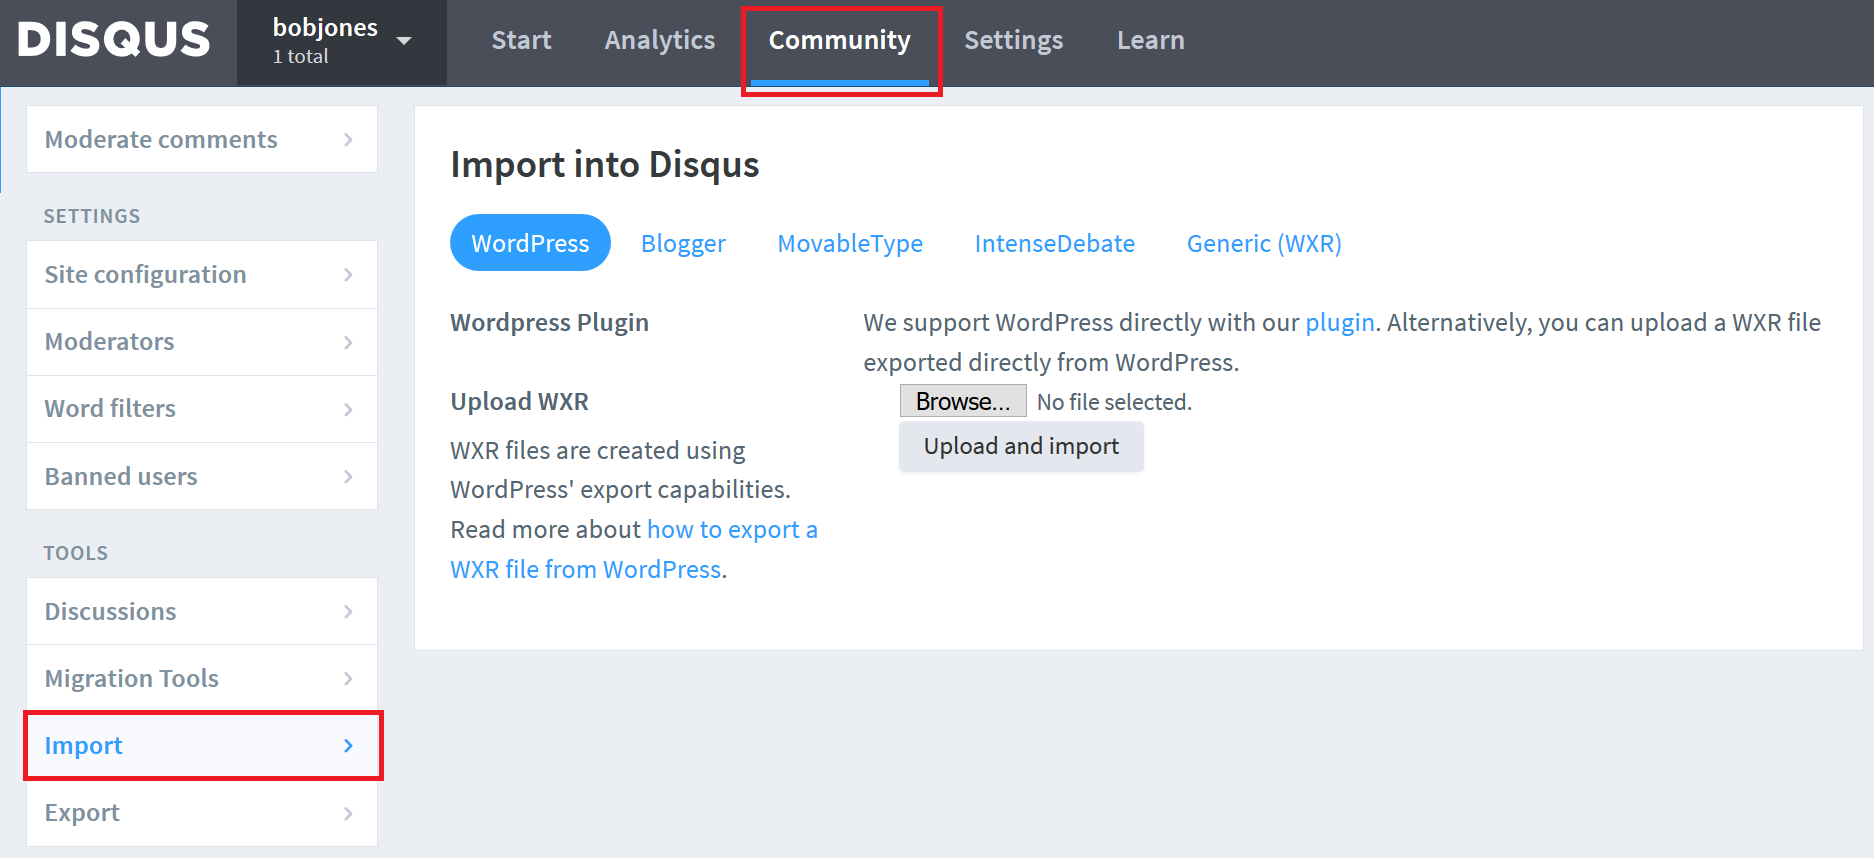
Now that you have the data in a proper format, head back to Disqus, and log in to admin your site. Next, click on the Community tab at the top of the screen, then Import in the left navbar. This step will use the WordPress importer, which is the default. Click the Browse button to navigate to the BlogML.Output.xml file created previously, and then click the Upload and import button. This will pull in all of your old data.
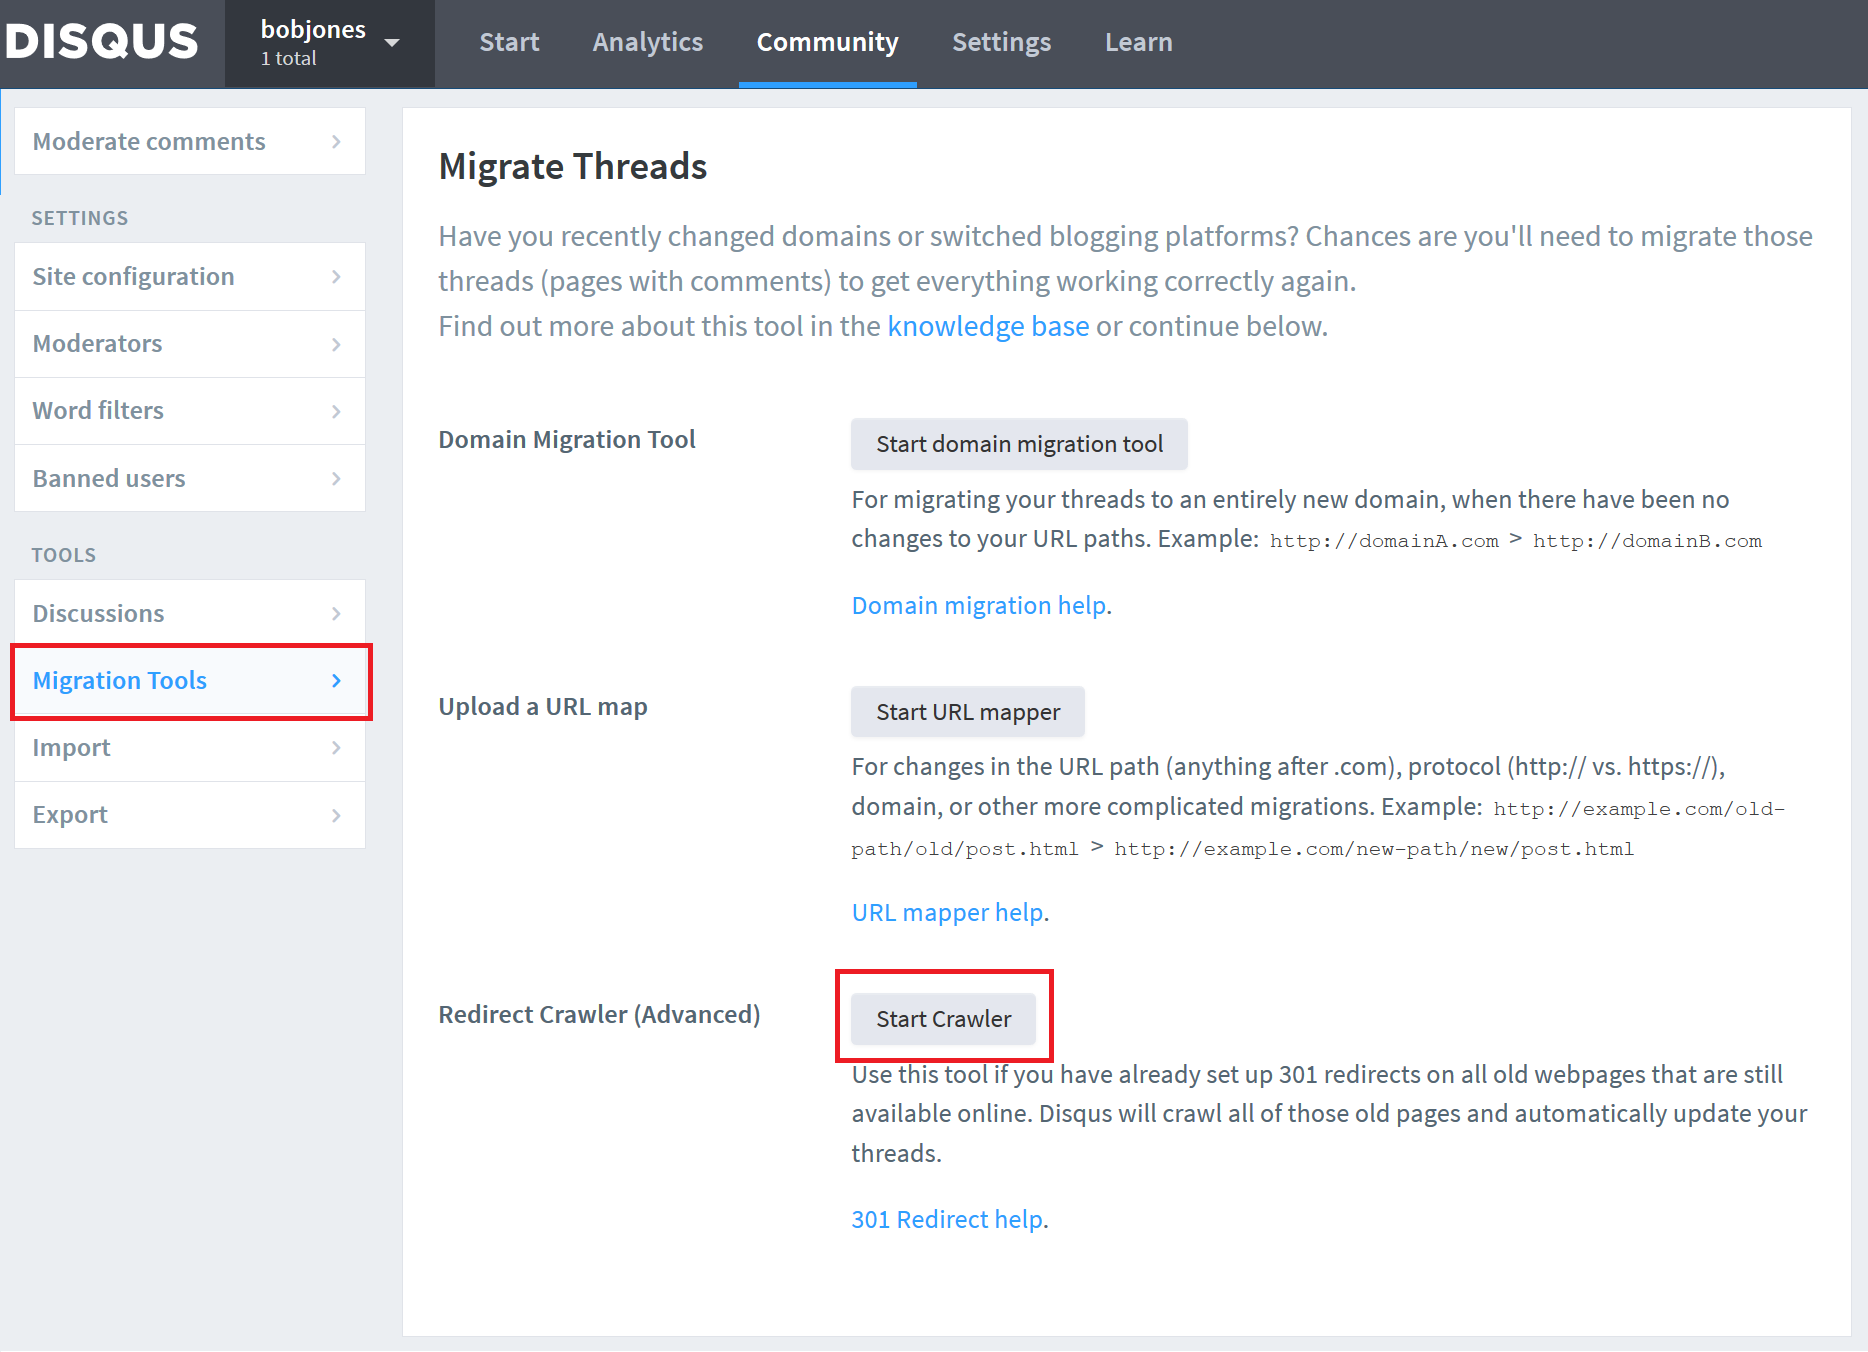
 Once that’s complete, click on Migration Tools in the left navbar, and then Start Crawler, which will make Disqus index your site.

Add to Ghost Theme
Now that your data is in place, Disqus needs to be added to your blog theme. You can get the full embed code for Ghost from the Disqus site by selecting Settings from the top navbar and then Installation in the left navbar. Select Ghost as your platform, and then follow the instructions given to add the embed code to your theme.
Alternatively, I have copy/pasted the code below that you can add to your Ghost theme’s post.hbs file which you’ll find in the /content/themes/[theme name] directory. I have inserted my script just before the the end </article> tag. You can add this pretty easily using the Kudu tools built into the Azure portal to edit my theme’s pages easily.
I have already filled in the required url and identifier variables using the Ghost helpers, so you can take the below and copy/paste to your site, changing only the YOUR_SITE_NAME text with the short name you used on the Disqus site.
<div id="disqus_thread"></div>
<script>

var disqus_config = function () {
this.page.url = '{{url absolute="true"}}';
this.page.identifier = '{{id}}';
};

(function() { // DON'T EDIT BELOW THIS LINE
var d = document, s = d.createElement('script');
s.src = 'https://YOUR_SITE_NAME.disqus.com/embed.js';
s.setAttribute('data-timestamp', +new Date());
(d.head || d.body).appendChild(s);
})();
</script>
<noscript>Please enable JavaScript to view the <a href="https://disqus.com/?ref_noscript">comments powered by Disqus.</a></noscript>
That’s it! Your comments should be imported, and once Disqus finishes crawling the site, they will start appearing on your old posts, while new posts will be open to take comments immediately.